Project Log: Matcha Making Robot Arm
- 4 mins
Matcha, a type of green tea, is great! Sadly, it requires a whole 2 min of preparation; I am far too lazy to make it as much as I would like. Naturally, I am trying to fix this dilemma in the most overcomplicated manner available – a home-built, 6-axis robotic arm! This is the first post in my quest to frothy green tea goodness.
Really though, this project is actually an excuse to learn more about robotics and to get back into making things. It’s clear that robotics is going to play a more predominant role in our lives (e.g. self driving cars). My day job exposes me to the control side of things (ML / AI), but I know almost nothing about the rest of it (mechanical, electrical, systems, so on). I don’t really know what I am doing in any of this, so please leave comments or questions on anything; I appreciate your input! As for this first post, I plan to go over some of the mechanical work that I have already completed.
Overall design constraints:
I want to strike a balance between specialized hardware and general purpose utility. Specialized hardware is easier to design and is cheaper, but less general. Cooking equipment has thus far lived in this realm – things like blenders, toasters, and bread makers. I plan to be someplace in the middle – a general base, 6-axis arm, with a specialized environment, tools, and controls.
I don’t have access to a shop, so it must be constructed in my apartment. My main tools are CAD (OnShape), a 3D printer (Lulzbot Taz 6) and an Amazon Prime account. I also like to keep costs down for obvious reasons.
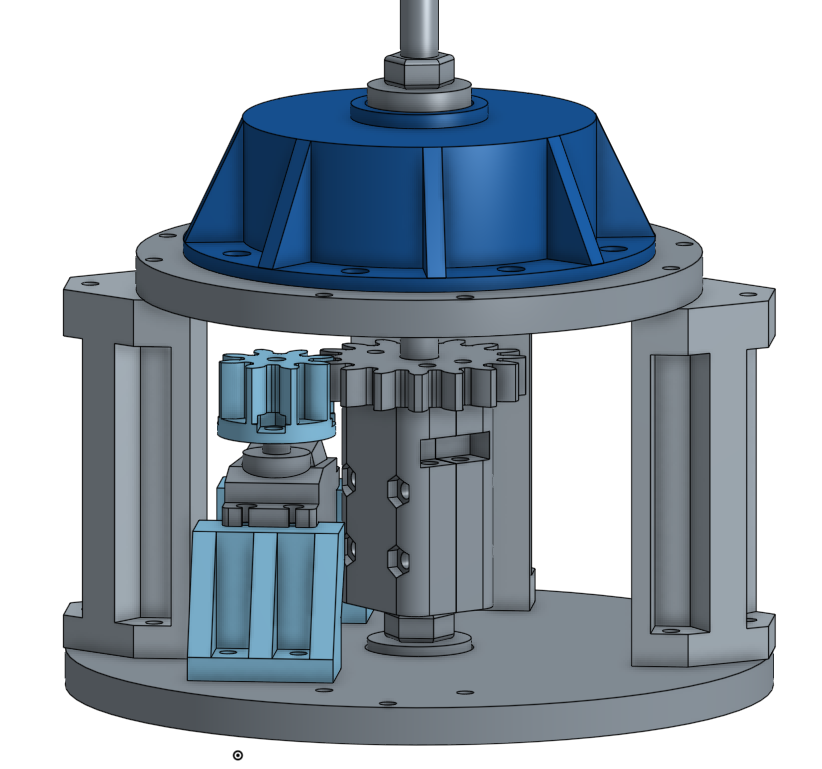
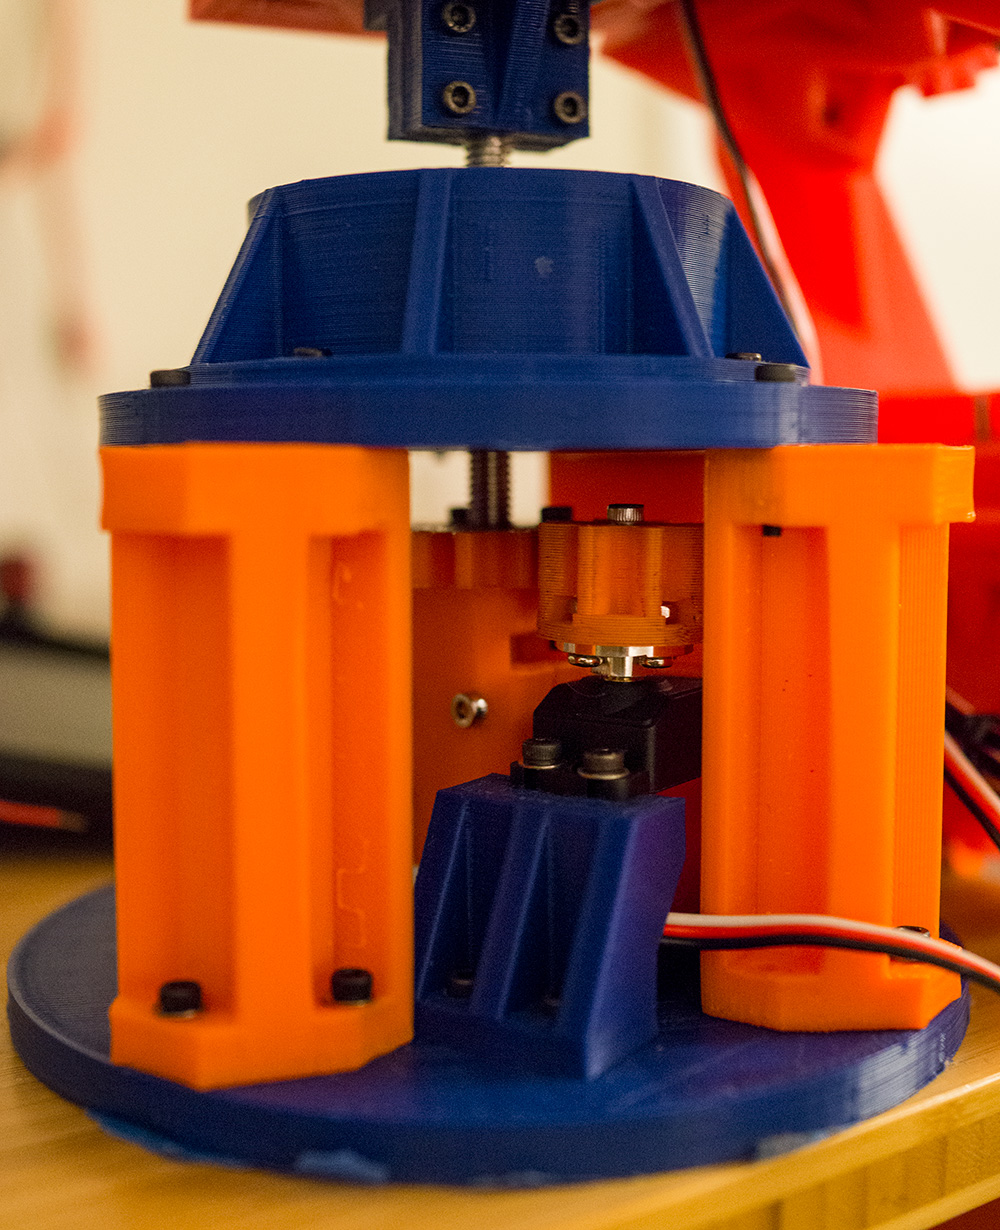
Base – axis 1:
The first axis needs to be quite strong – high radial and capable of axial loads to handle the weight of the arm pushing down and the lever effect of the arm when extending. I settled on using a thrust bearing. Others have used these for arms, so this is nothing new. These bearings are capable of handling huge (100s of kg) axial force. I can leverage this and help address the non-axial loads by sandwiching my axle (a m8 threaded rod) between two rigid pieces of plastic.
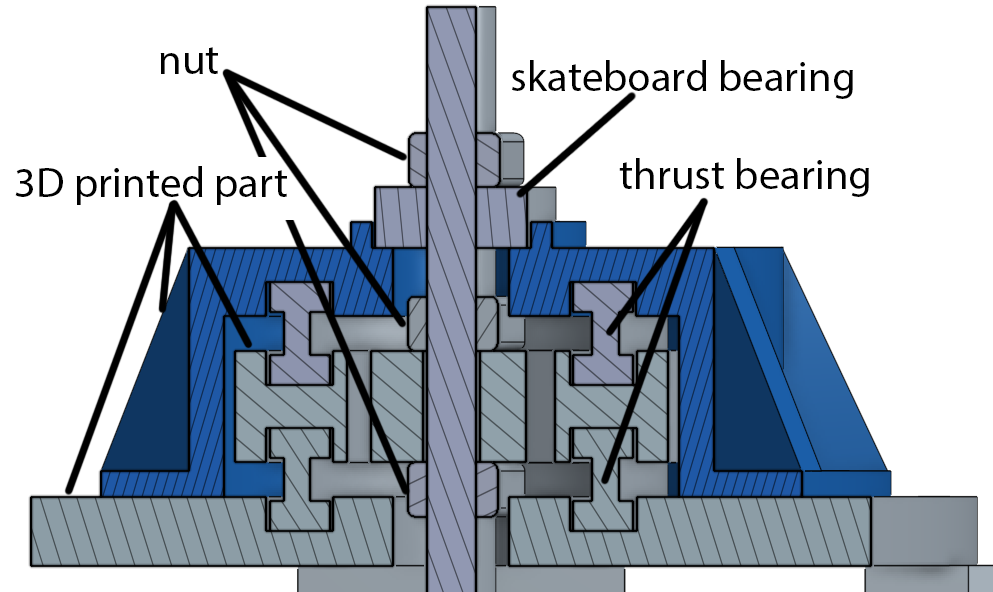
To drive this, I secured a 20KG servo geared 2/1 to the 3D-printed base, and added a few more skateboard bearings around to prevent off-axis movement. The resulting structure is reasonably strong but there is still some play in the 3D printed parts. Good enough for now!
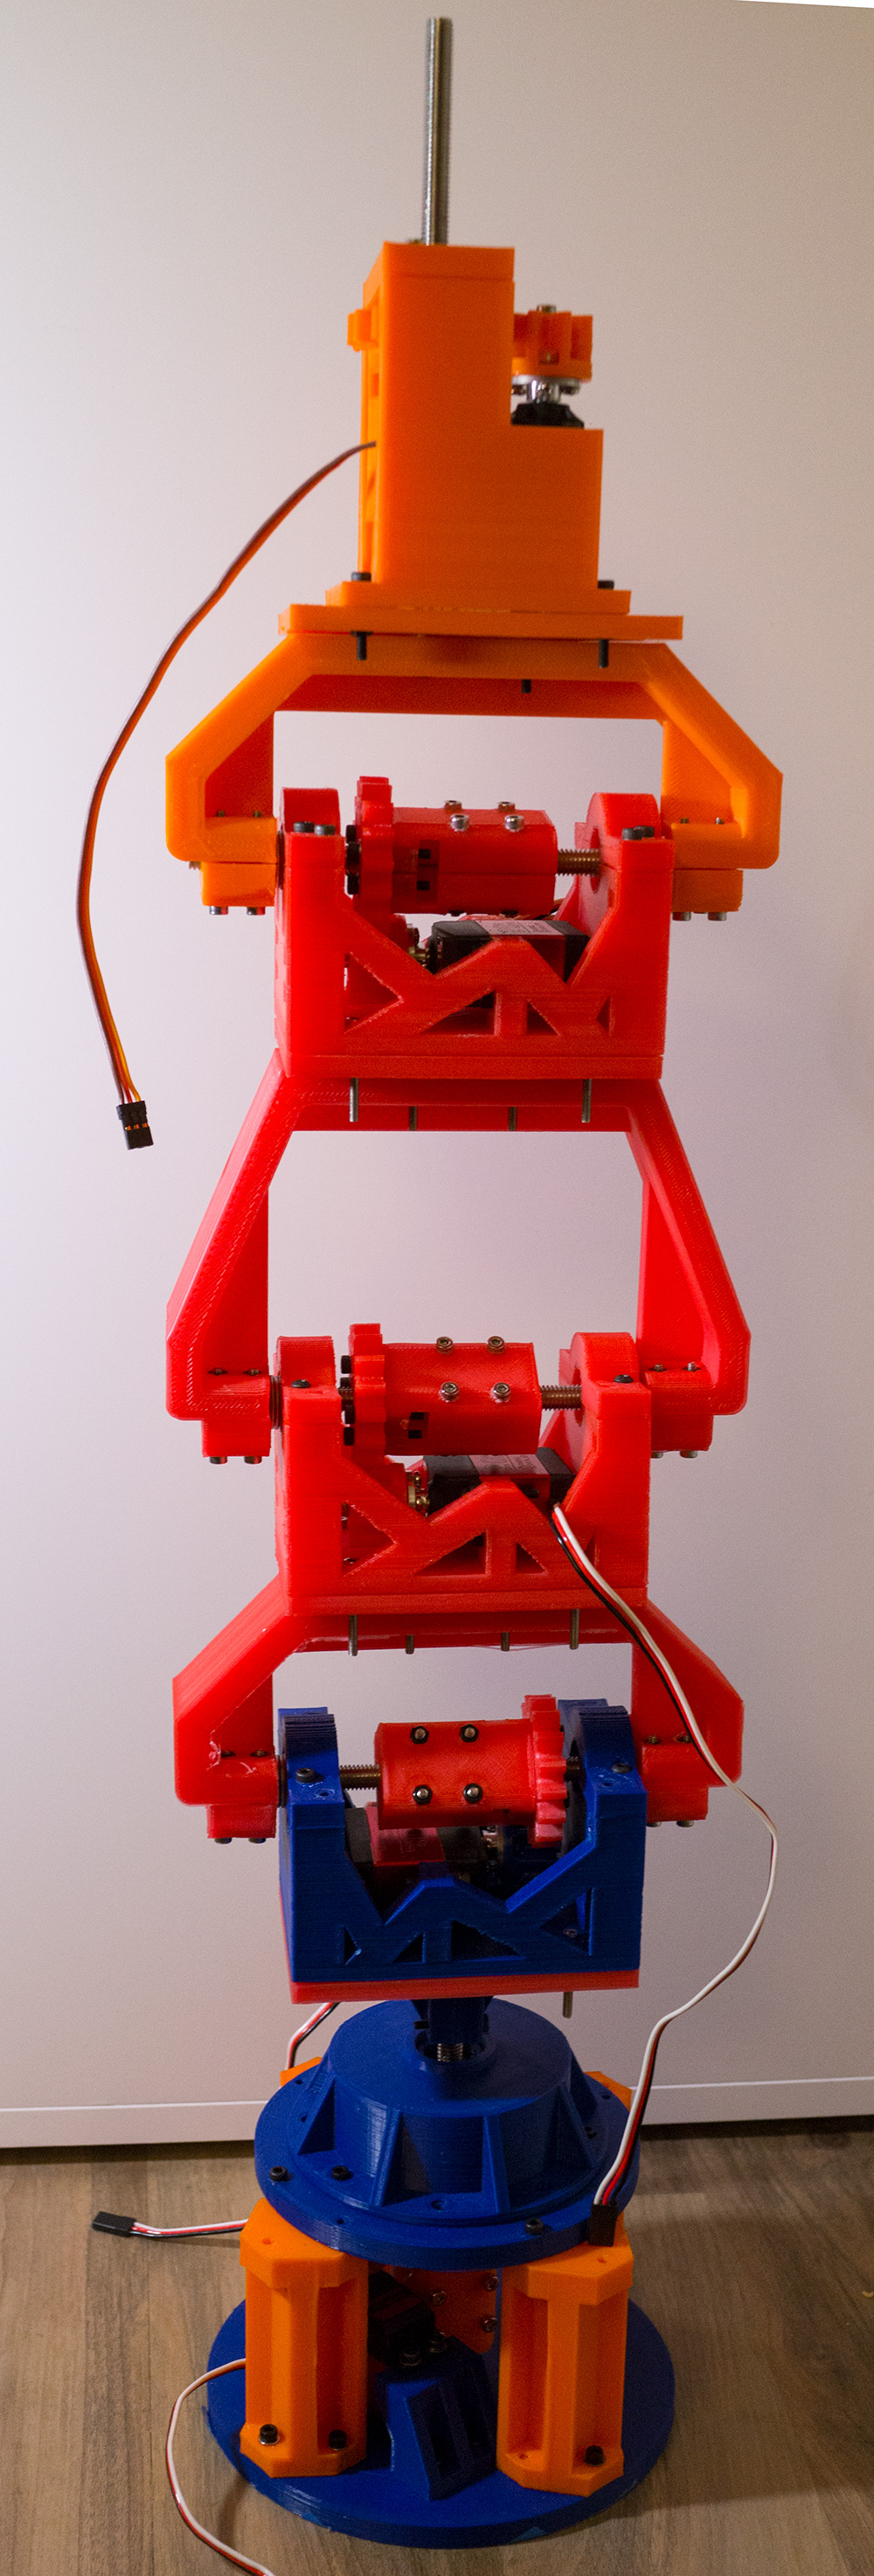
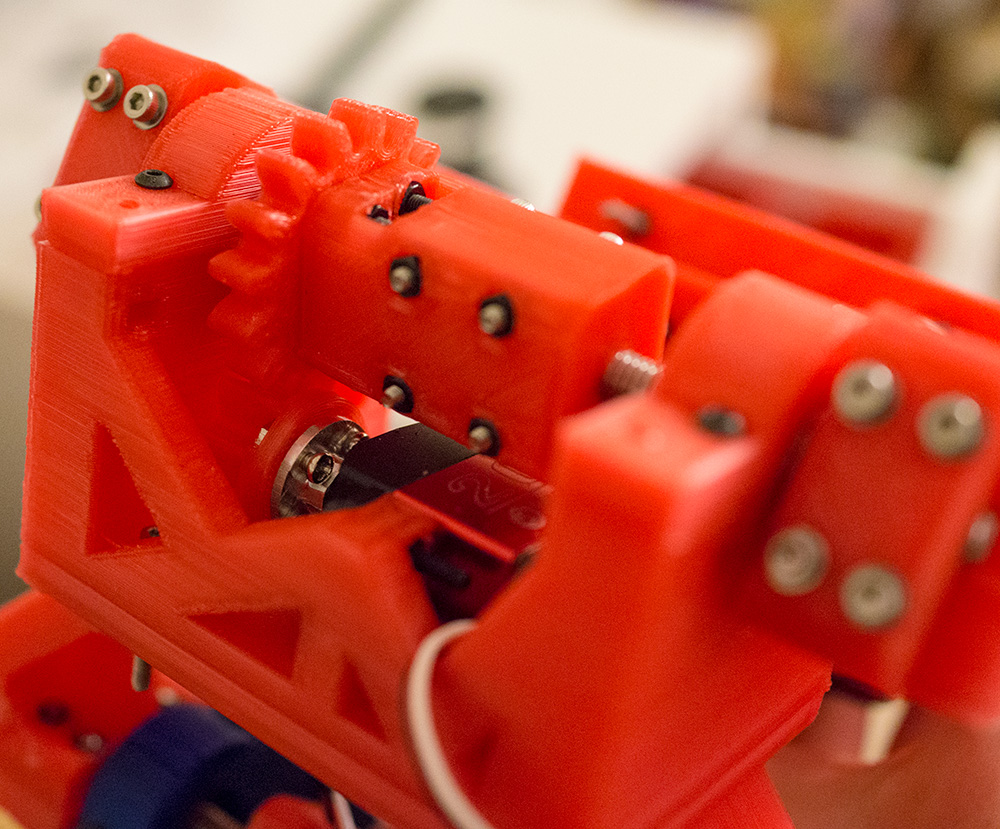
Axes 2 - 4:
My main consideration was what to do with motors. I knew I didn’t want to deal with any of the more exotic actuation types such as pneumatic. In the interest of keeping things simple, I decided to place motors as close to the driving axis as possible and go with simple gearing as opposed to more complex cable / belt driven solutions. While researching I was astonished at the complexity of industrial arms. In particular the geek group has a few different teardown-like videos of two rather large KUKA arms that I would recommend. I tried to keep my pieces as small and lightweight as possible both to lower print times and to keep the weight down. I once again went with the same servo form factor for motors mostly due to ease of use. I used the same 20kg motor, but expect to need to swap out the first axis with a higher torque version. The axes are M8 threaded rod, held via friction to some 3D printed parts.

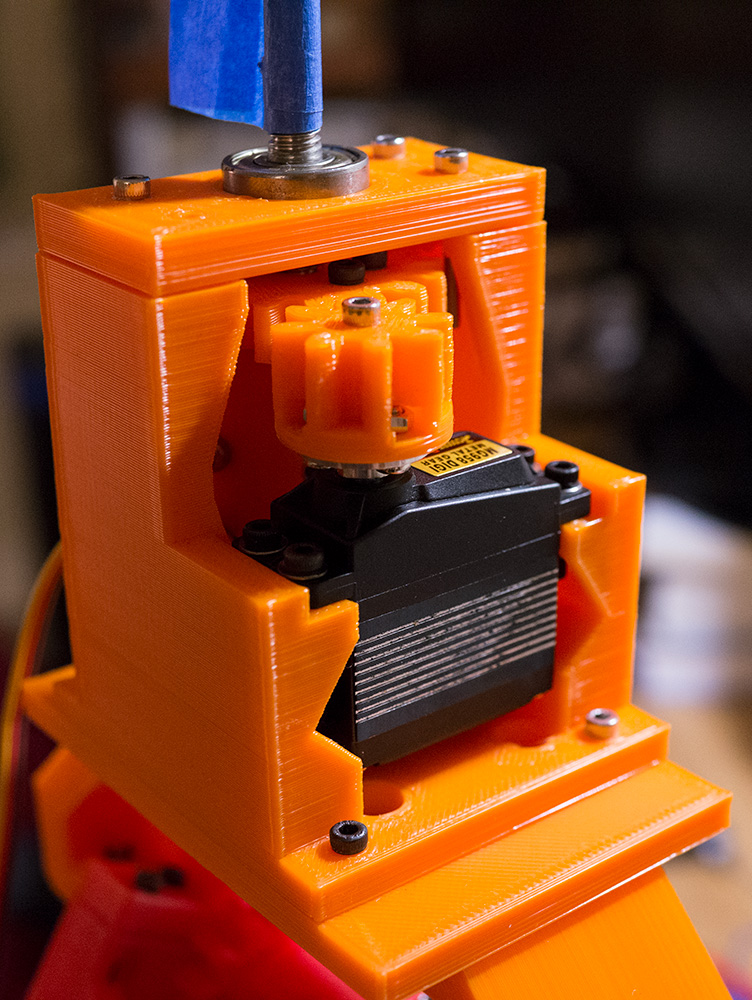
Axis 5:
Not much design thought went into this. It needs to rotate, but doesn’t need to have as much axial load so no thrust bearing is needed. I used another [20KG servo](https://www.amazon.com/gp/product/B01N0XZOZU/ref=oh_aui_search_detailpage?ie=UTF8&psc=1], once again geared down to rotate a threaded rod. Skateboard bearings are used above and below to keep the axle in line.

Future Posts:
I hope to update this blog periodically as the project progresses with interesting tidbits I find along the way. As for next steps, gripper design is currently still up in the air. Additionally, I am in the process of putting together sensors and controls. My first pass taught me that this is going to be MUCH harder than I originally thought…. Hopefully more to come soon!